Steps to DIY Solar
Steps To DIY Solar
If you are considering DIY solar but aren’t sure what is involved, here are the basic steps. If it seems daunting, we can help with many of the more technical tasks like system sizing and design. Some services are included with the purchase of our DIY solar kits or can be purchased “a la carte”. Let us know how we can help.
1. Gather Some Information
To install your own solar power system, start with the basics. You will need to know:
- Are you already connected to the grid?

- What kind of system do you need? (Grid-Tied, Grid-Hybrid, or Off-Grid)
- How much power do you use currently?
- Where do you want to put your solar? (Roof, Ground, or Pole Mount)
- Do you now, or will you in the future, want backup power?
- What solar incentives are available in your area?
2. Research Utility, Code and Permit Requirements
The next step is to research your local requirements.
- Utility application process & any restrictions
- Permitting & Inspection – You will need an electrical permit, but what about a building permit?
- Fire codes & miscellaneous local standards
Determine how much assistance you will need not only so you know how to design your system and install the equipment, but also to ensure that you meet the legal requirements of your utility (if you’re on grid), as well as your local permitting and building codes.
3. Select Your Support Team
When reviewing kits and quotes from different companies it’s important to make sure you’re comparing “apples to apples”. You need to compare not only the specific components (brand, quantity, power rating, reliability, warranty and more), but also the Supplier’s:
- Knowledge, experience and expertise.
- Types of services they offer.
- Level of customer service they provide today and years from now.
- What is the value that you are getting from the supplier relative to the price they are asking for?
Bottom line: You want to get the right products and services for a fair price from the most qualified, reputable and service-oriented vendor.
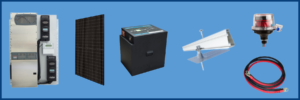
4. Determine Your System Specifications & Decide on Equipment
Once you’ve gathered your information and have made some decisions about  what additional support and resources you will want for your project, it’s time to make some decisions.
- How much solar will you need to cover your usage?
- If you’re going to have backup power, what loads do you want to back up? For how long?
- Which specific pieces of equipment are right to meet your goals?
Finalize your system size and details, including the product manufacturers. Depending on how much support you have chosen, and whether or not you are using a kit, it is now time to calculate your system size and required equipment. If you are using a full-service team like Fire Mountain Solar, the fundamentals are included in your purchase.
5. Purchase Your Equipment & Materials
It’s time to purchase your solar specific equipment and ancillary electrical components (things like electrical wire). Work with your support system to determine what is included in your kit and what will need to be purchased locally.
6. Prepare
While you wait for your solar equipment to arrive:
- Gather the locally sourced materials you’ll need. Arrange for the help you’ll want to lift heavy items or for tasks that take more than 2 hands.
- Get the installation areas cleaned.
- Apply for your permits and interconnection agreement (if applicable).
- Make sure you have the tools you will need.
- When your parts arrive, check that you received everything you ordered right away – don’t wait or you might not be able to make a claim.
- If you have any questions about your equipment’s condition reach out to your support team immediately.
- Now is also the time to have any lingering questions answered!
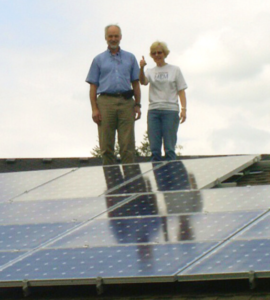
7. Install
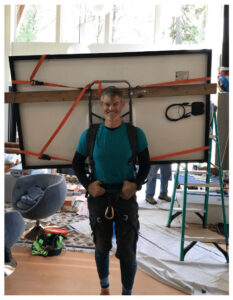
Your excellent preparation will now pay off. But even with the best planned project you can run into unexpected snags and questions. This is when having a professional support team experienced in working with DIY installers comes in handy. Don’t find out the hard way that the reason you got such a great deal on your products is because your vendor doesn’t have the ability to provide you with the support you need beyond selling you the product.
8. System Activation
Have your electrical, building, and/or other permits finalized after installation, which usually includes an inspection by your local building department. If you are on the grid, once your permits are signed off contact your utility to finalize your interconnection agreement and for authorization to activate the system. Depending on your current meter, the utility may need to install a new bi-directional meter to allow for net metering. Once you have final approvals you can activate your system!
Congratulations!
Your DIY solar system is now up and running.
Enjoy Your Power, Your Way!